TAGS: cum se demonteaza portiera, cum sa demontez usa, cum se scoate panoul de la usa, tapiteria cum se repara geamul electric inchiderea centralizata, pas cu pas, fotografii, poze,
How to Remove an Inside Door Panel from a Car, how to repair the electric window, How To Disassemble Door panel, how to take the inside door panel off, VW passat b5 pictures, photos tutorial, steb by step
Tutorial pas cu pas Demontarea usilor la VW Passat B5, fata dreapta si stanga, precum si usile din spate.
Indepartarea panourilor din interior.
For English explanation please read below but the pictures should be self explain.
Step by step tutorial. How to disassemble doors and door panel at a VW PassatB5. Door assembly. Removing inside door panel and track. Left side, driver side and right side, passengerside and back doors.
Daca vrem sa schimbam difuzoarele (cazul meu) sau este necesara o reparatie la mecanismul de inchidere centralizata, broasca sau la cel electric (sau manual) de ridicare a geamului, macaraua, sau daca portiera este lovita usor si trebuie indreptata din interior, primul pas este indepartarea demontarea panoului, tapiseriei, de pe interiorul usii. Aceasta poate pune unele probleme datorita aparentei lipse a suruburilor sau dispozitivelor de prindere. De asemenea necesita finete si atentie, se lucreaza cu plastic, usor de rupt.
If you need change the speakers (my case) or you need to do some repair at the electric window or the door locking mechanism at your VW passatB5, the first step is to remove the door panel. Here is how to remove the door panel, left, driver side and right, passager side. Also for the back doors, the steps are identical to the front right side.
Pentru inceput, usa din partea soferului – Pasul zero coborati geamul!
Firs, left side, driver side door – Get the window down!!
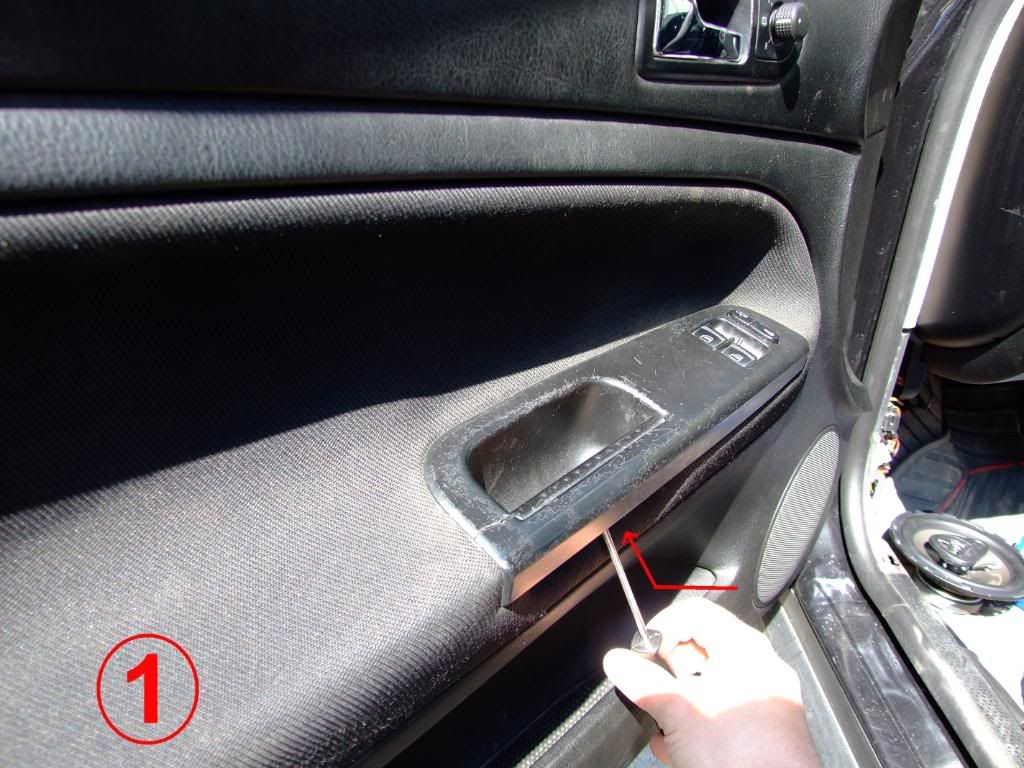
Pasul 1 – Cu o surubelnita mica, pe dedesubt se scoate piesa de plastic din interiorul manerului.
First step – With a small screwdriver, from below remove the small plastic handle as in pictures.
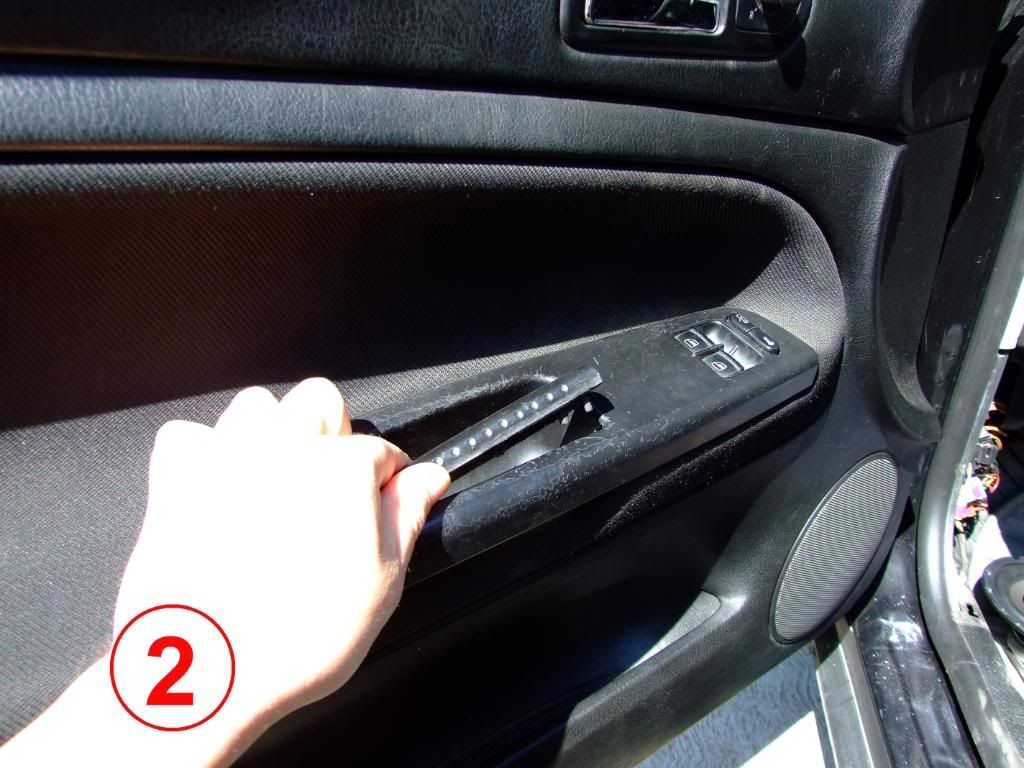
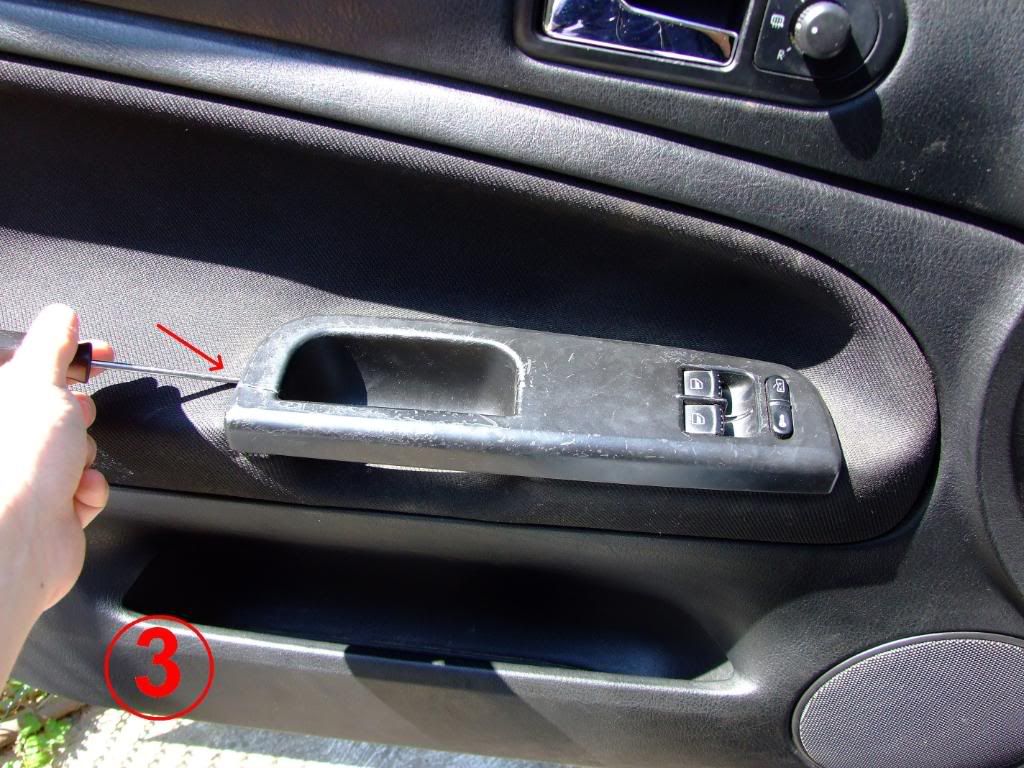
Pasul 2- Acum aveti acces si posibilitatea sa ridicati toata partea de plastic. Cu aceasi surubelnita mica, de jur imprejur, ridicati usor plasticul, dupa cum se vede in fotografii.
Step 2 – Now, you car remove the big plastic handle. With the same small screwdriver, lift gently, around, as pictured.
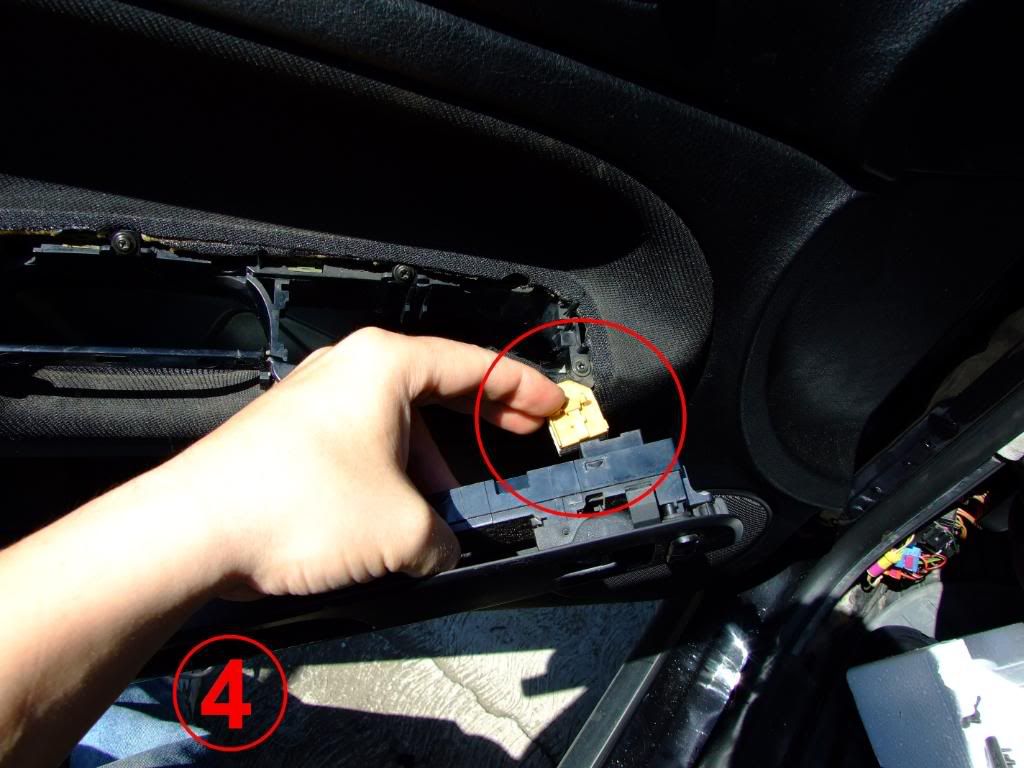 Cu grija, scoateti mufa cu fire.
Carefully, remove the wires.
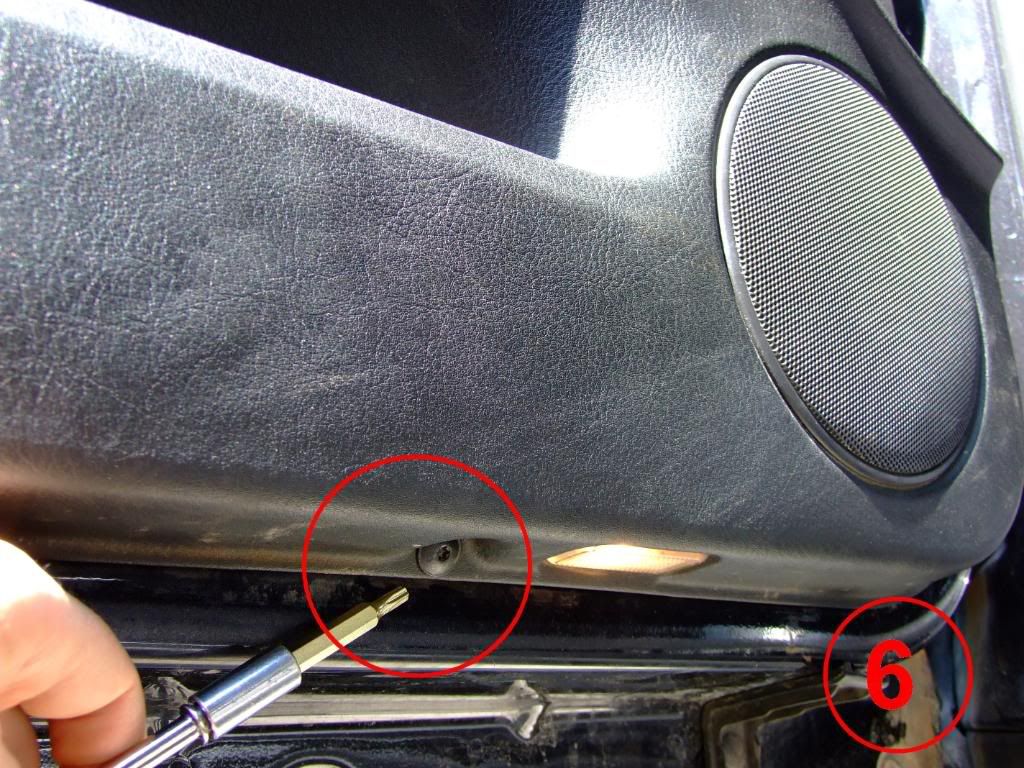
De acum aveti acces la suruburile mari care fixeaza panoul.
From now, you have access at the big screws who fix the door panel.

Dupa ce ati scos suruburile, cu o surubelnita mai mare, si un pic de forta, indepartati panoul de jur imprejur. Este prins in cleme, deci fara frica la zgomotlele de rupt. 🙂
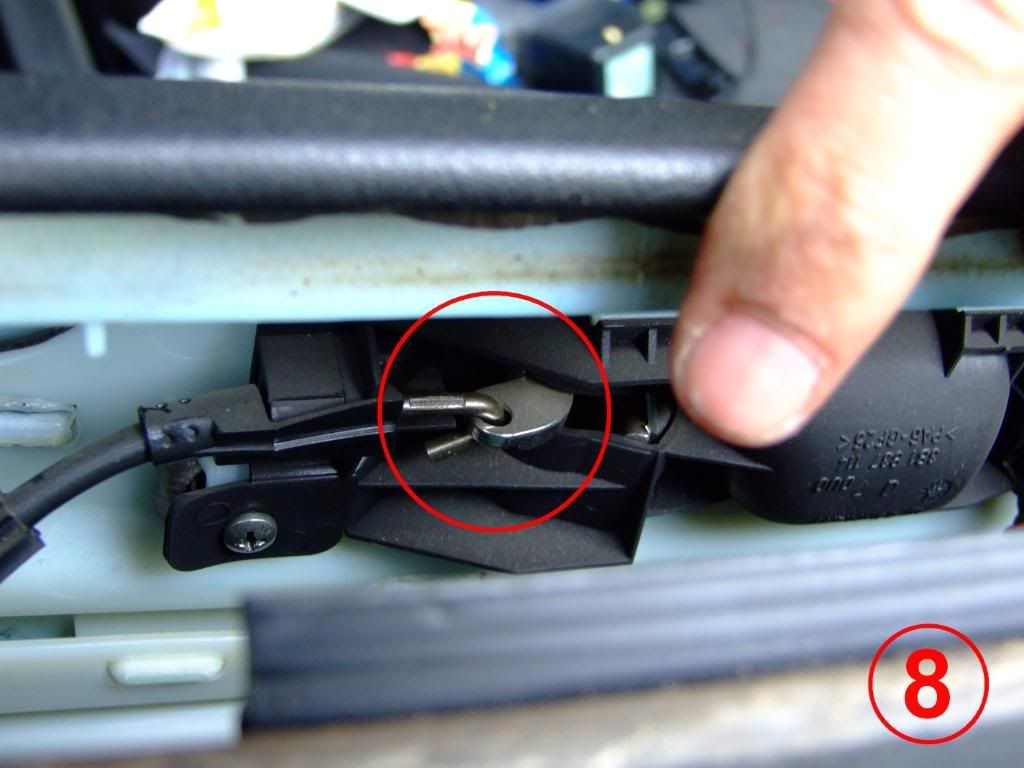
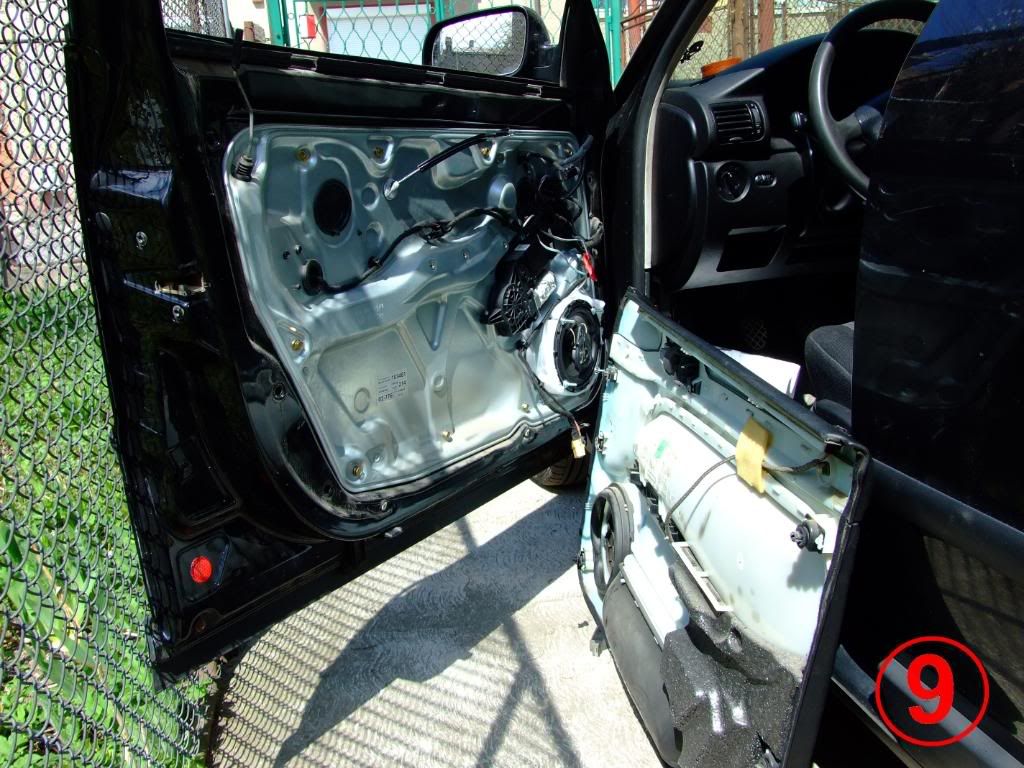
Dupa ce e desprins de tot si ramane agatat doar la geam, ridicati in sus 2-3 cm. Atentie, nu trageti tare, sa aveti pe cineva langa, sa va ajute sa desfaceti carligul de la inchiderea centralizata (vezi foto) aflat pe interior si apoi e gata, aveti panoul demontat.
After all the screws are removed, with a bigger screwdriver and a little force separate around the door panel. No worries about the cracking noises. 🙂 When all around is separated, lift up about 1 inch (2-3cm), because is fixed, hanged, near window. Also, in this moment, ask somebody to help you separate the hook from the central locking system. It is inside, see the picture. Next, all done! The door panel is removed.
Portiera dreapta si cele din spate – Right side door and the back doors
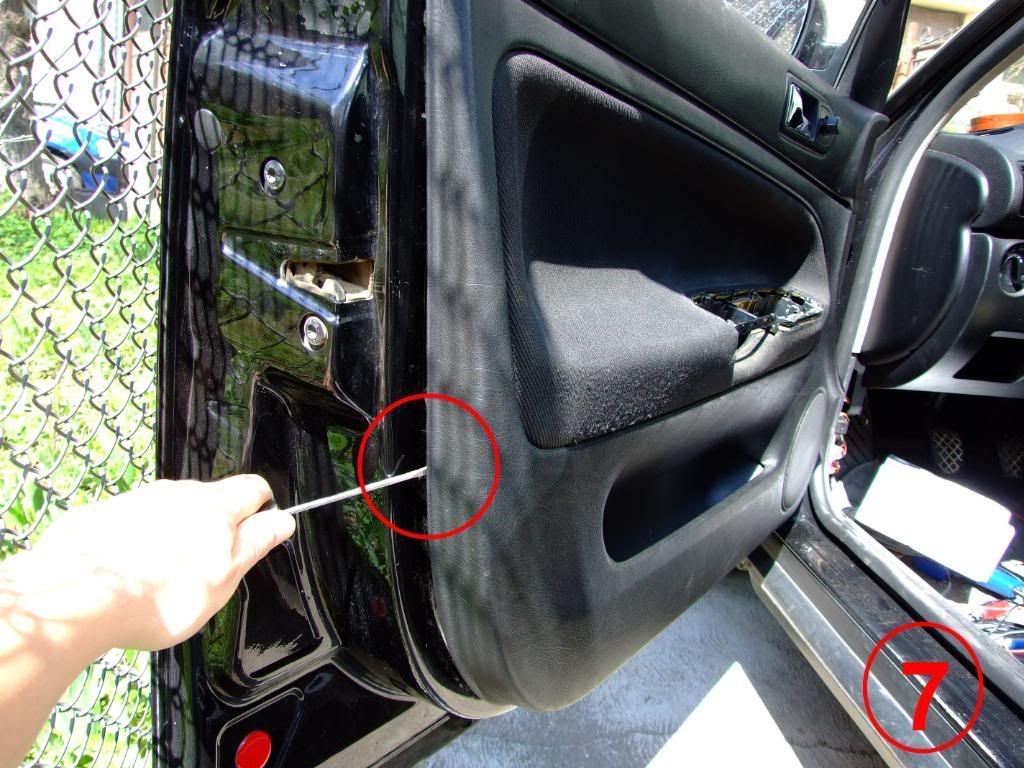
Pentru usa din stanga, si usile, portierele din spate, pasii sunt foarte asemanatori, difera doar prinderea la maner. Se vede in fotografiile urmatoare cum se face. Atentie, grija mare si priviti fotografia cu atentie la detaliu, sa vedeti unde va bagati surubelnita. 🙂 Nu rupeti ceva!
For the passenger door, the left door and the back doors, the steps are exactly the same, the only diference is the handle. Please pay BIG attention to the details in the pictures below to see where to put your screwdriver. 🙂 Do not broke something! Have a beer and have fun!